Makizushi with Pickled Vegetables

Among my purchases at the Mitsuwa Marketplace in Edgewater, New Jersey, were Japanese produce I rarely see outside of New York City’s Sunshine Mart off St. Mark’s Place. I was so excited to see yamagobo, or Japanese pickled burdock, because I have never eaten those outside of Sushiden. The pickled radish, or takuan, was more familiar, and of course, so were the shiso leaves.

These three ingredients inspired me to make my own makizushi at home. I learned to order them from the Dr. after every sushi and sashimi meal at Sushiden. He just asks the chef for the three ingredients, and voila, small hand rolls are served. A few months ago, I had picked up some soy skins in lieu of nori, or Japanese roasted seaweed, and I was glad to finally use them here. (Don’t worry, I’m not turning vegetarian. I bought them because they looked really pretty.) They didn’t add anything special to the rolls and I still preferred the nori over them, but they made colorful presentation when served with fried lotus root.

I’m not going to get into the proper way to make sushi rice and all that, but you’ll need a Japanese bamboo mat to make respectable rolls. In a pinch, you can user Saran wrap, too, just don’t let your Japanese friends know.

Ingredients:
yamagobo, drained, chopped
takuan, drained, julienned
shiso leaves, chiffonade
sushi rice, cooked
mirin, or rice wine vinegar
nori
wasabi, optional

1. Place nori on a Japanese bamboo mat. The mat should lie so it rolls away from you, not from side to side. Keeping your hands moistened with vinegar-water, put a scoop of sushi rice in the center of the nori and spread evenly on top of the seaweed. Spread a streak of wasabi across the middle if using, then add a layer of the vegetables across the center of the rice.
2. To roll, fold the bamboo mat so the filling is enclosed in the center of the nori, then moisten the top edge of the nori and seal the roll tightly so that it won’t fall apart when sliced.
3. Remove the mat from around the roll, seam side down. Slice the roll into one-inch rounds straight down using a sharp knife or serve as small rolls to eat with hands.

Related post/s:
Beautiful shiso oil from shiso leaves
Vietnamese summer rolls are harder to make
Splurge at Sushiden

Quail Egg Tapas

I was watching a rerun of an Andrew Zimmern episode shot in Barcelona where he came across some quail eggs, pointed at them and said, Quail eggs; we don’t really see that back at home. I found the comment odd because I see them every time I go to Chinatown. And as far as I can remember, we often had them stocked. In fact, I had a dozen in the fridge!

I usually like to boil them, peel off the shell and throw them in a wok of stir-fried vegetables, but over the weekend, I was inspired to fry them for breakfast and eat them with chistorra, a semi-cured sausage from Spain I picked up from Despaña. You probably make your own breakfast already, so why not use different ingredients the next time? This is very lazy, but the presentation looks like you made an effort.

Ingredients:
quail eggs
chistorra sausages, halved lengthwise
oil

Optional:
mozzarella cheese
basil leaves
tomato
baguette, toasted

1. Using a small skillet, heat some oil. Fry sausages until light brown. If you have a grill press, use it to press the sausages down.
2. In the same skillet with the rendered sausage fat, fry the quail egg like you would a regular egg, but keep watch: it’s smaller and will obviously cook faster.
3. Assemble on serving plates any way you like. Feel free to add mozzarella cheese, basil, tomato or toasted crusty bread.

Related post/s:
Tapas and where to eat in Barcelona, Spain
Despaña sells chistorra for $8 a package while Asia Food Market carries quail eggs

Pig’s Feet With Caramelized Onions

With all the fish I’ve been eating the past week, it was time to go back to pork. What better way to celebrate my return than to, ahem, trot back to the kitchen with pig’s feet. This is another recipe from Stéphane Reynaud’s Pork & Sons. If you can get a glimpse of the book, turn to page 190–you’ll want to make the recipe at home, too.

In Chinatown’s Deluxe Food Market, pig’s trotters are less than $3 for a pair. If you can’t find them in the frozen section, get one of the Chinese men’s attention and say “feet” while pointing at your shoes; one of them will surely direct you to the right shelf. The original recipe uses walnut oil to bring out the richness of the feet. I didn’t want to spend $12 on a bottle from Dean & Deluca, so I stuck with my good olive oil at home. I think I achieved what the author was thinking of here.

The funny thing about pig’s feet is that people forget that it’s not offal. Sure, a foot is an odd part of the pig to be eating, but you don’t eat it like you do chicken’s feet at dimsum. (I’ve never heard of pig’s foot in a stick either.) It takes a couple of hours to make the feet soft and when you take them out of the boiling water, the meat and skin fall off the bones easily. They are rich in fat content and very gelatinous, so you get the same fatty meat that you do from a very Filipino pork adobo. It’s all that fat you can be squeamish about, not which part it came from.

Ingredients:
2 pig’s feet, thoroughly rinsed
4 strips bacon, chopped
2 carrots, peeled, chopped
1 white onion, halved
2 red onions, thinly sliced
1 bunch scallion, chopped
half a bunch of parsley
2 bay leaves
1 tsp brown sugar
1 tbsp balsamic vinegar
chives, chopped
salt, pepper, oil

1. In a large Dutch oven, put the feet, bacon, white onion, carrots, scallions, parsley and bay leaves with enough water to cover. Cover and bring to a boil, then lower the heat and simmer for 2 hours.
2. While waiting for the feet to soften, heat some oil in a skillet and sauté 1 red onion and cook until soft. Set aside.
3. After 2 hours, remove the feet and bacon from the pot using a slotted spoon. Using a fork and a knife, separate the meat and the skin from the bones. This should be fairly easy. Discard the bones.
4. Chop the bacon. Combine the sautéd onion with the feet meat and skin plus the bacon. Season with some salt and pepper. Using a Saran wrap, spoon the mixture and arrange like a sausage. Cover and roll like a tight, big blunt. (Oh, come on. You know.) Put in the freezer for 30 minutes.
5. While waiting for the pig’s feet sausage to form, caramelize the last red onion by sautéing some hot oil in the same skillet and mixing with brown sugar. Set aside for topping.
6. Make your dressing. Whisk together some olive oil and balsamic vinegar.
7. After 30 minutes, preheat your broiler. Remove the feet from the freezer, unwrap and cut into 1/4-inch-thick slices and place on an ovenproof serving plate. Heat briefly in the broiler, just enough to warm the meat up, less than 5 minutes. To serve, top with caramelized onion and chives, and then drizzle with oil-balsamic dressing.

Related post/s:
You owe it to yourself to have a copy of Pork & Sons
Where to buy pig’s trotters in Chinatown
Try the pig’s ears while you’re at it

Soppressatta With Herbs

It really can’t get more decadent than this: one of my favorite sausages happily marinating in the finest olive oil and fresh herbs. Well, okay, add foie gras and you’re really set. But this is so easy; requires only a week of preserving and you have yourself about two weeks’ worth of appetizers.

Ingredients:
a chunk of good quality soppressatta, sliced thinly
2 sprigs of thyme
3 sprigs of rosemary
10 juniper berries
1 garlic clove, crushed
1 bay leaf
olive oil
baguette, to serve

1. Place and arrange the soppressatta slices in a pickling jar with herbs and spices. Pour in olive oil to cover. Seal tightly and store in the fridge for at least a week.
2. When ready to eat, scoop out a serving or two onto a plate and microwave for 15 seconds, or enough to melt the olive oil. Serve with toasted baguette and a nice glass of red wine.

Related post/s:
You owe it to yourself to have a copy of Pork & Sons
Odd cuts and guts cooking, Filipino style

Hungary: Beef with Vadas Sauce and Dumplings

I can’t believe 2007 passed without me cooking anything for my Global Gastronomy project. Bad, Cia! I have at least four pending recipes from acquaintances and friends, but c’est la vie, the year went by just like that. Over the weekend, it was colder in New York City than it was in Budapest, Hungary, and their city experiences what they call a Russian front. Canadian front? Meh! It gets cold over there.

I work with a few talented boys based in Budapest. We talk every morning over IM. If work doesn’t get in the way, I get a spatter of Hungarian words in exchange for some quirky American slang. They know about this blog and we are each other’s contact on Flickr, so when I asked one of them, Keki, to send me a family recipe, there were no questions asked. He said he had to use the dictionary a lot to translate his mother-in-law’s handwritten recipe, so I was very grateful when I received two: a vadas sauce to go with beef and the dumplings to complete the meal. Vadas comes from vad, which means “game”, and Hungarians make the base of the sauce using all kinds of gamey meat. I used beef to make it less difficult.

My arms got tired when I tried this at home and I understood why Hungarians don’t make it often. You need at least a day to marinate the beef and a couple of hours to get the sauce and the dumplings done. Keki said that his mother-in-law makes a wicked version, and because they’re not readily available in restaurants, he looks forward to eating it. Even the kids love it, especially before they find out that the sauce has carrots in it.

When I let Keki preview the photos I took, he gave me the biggest compliment: he said he “felt the smell of vadas” even though mine looked more orange because of the extra carrots I put and seemed a little thicker than what he was used to. I could have used a full cup of sour cream to make it less orange–apparently, a lot of sour cream is very Hungarian. I thought I did better with the dumplings because I’ve had the Czech version, knedlicky, when I visited Prague. If your vadas sauce is creamier, you can sop the dumplings while you eat the beef.

When I finally sat down to eat, a wish to visit Budapest sooner than later floated in my head. Thanks, Keki.

Ingredients:
2 pounds beef tenderloin
4 slices of bacon, chopped
3 carrots, peeled, chopped
2 onions, chopped
1 parsnip, peeled, chopped
3 bay leaves
2 tbsps of flour
1 cup sugar
1 tbsp sour cream
1 tbsp mustard
lemon juice
salt, pepper, oil

For the dumplings:
1 baguette, torn in smaller pieces, toasted
whole milk
2 eggs
2 tbsps flour
a knob of butter, melted
salt

1. In a nonreactive pot, render some bacon fat. Add the beef and brown on all sides. Move the beef to the side while you sauté the onions. Add the carrots and the parsnip and cook for about 5 minutes. Don’t forget to turn the beef to avoid burning. Add enough water to cover and toss in the bay leaves and some pepper. Cook in low fire for about 3 hours, covered. After 3 hours, let it cool and store in the fridge for up to 24 hours, turning the beef occasionally.
2. When ready to cook, remove the meat from the water and set aside. Save some of the water. Using a slotted spoon, remove the vegetables and transfer to a large bowl. Mash.
3. Make the dumplings. In a large mixing bowl, soak the toasted baguette in milk. Set aside.
4. Make the roux, or the sauce thickener. In a large skillet, heat vegetable oil in medium heat until somewhat smoking. Pour flour and mix with a whisk. Keep mixing for about 15 minutes or until flour is red-orange. If black spots start to appear in the flour, it means you’ve burnt it. You have to start over. Remove from heat and keep mixing with the whisk to help cool down the roux. When cool, add to the mashed vegetables.
5. Make caramelized sugar. Heat another skillet and cook the sugar with a whisk until it caramelizes. Remove from heat and set aside.
6. Now you have a a large bowl of mashed vegetables with roux. This is your vadas base. Use the leftover water to keep a sauce consistency. Add the sour cream and mix. Add the caramelized sugar. Season with the lemon juice and the mustard until you get a somewhat sweet and sour taste. Set aside.
7. Don’t forget the dumplings. By this time, the baguette has absorbed all the milk. Add in the eggs, flour, butter and salt. Mix until you get a soft and sticky batter.
8. Boil some water in a large pot. When boiling, spoon some batter and make a few balls. Drop them in the boiling water and cook for about 5 minutes, or until they come up to the surface. Avoid overcrowding. Using a slotted spoon, remove them to a chopping board. Slice in thick rounds when cool enough to handle.
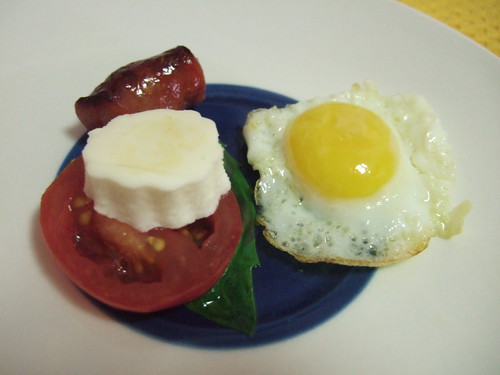
9. To serve, slice the beef in thick slices. Arrange the beef on a plate with some dumplings. Pour in some sauce on the side.

Related post/s:
More Cooking the World recipes: Thailand
About Cooking the World: Global Gastronomy Food Project