• 82-18 45th Avenue, Elmhurst, Queens
    $20 each for 4 people, without drinks, with tip
    718/898.8001
    ♥ ♥

    One of my favorite eating partners was in town from Chicago, so I basically forced her to eat in Queens and drag Paul, her Malaysian friend, with her so he can order for the rest of us and show us Malay food in the city.

    Tastiest:
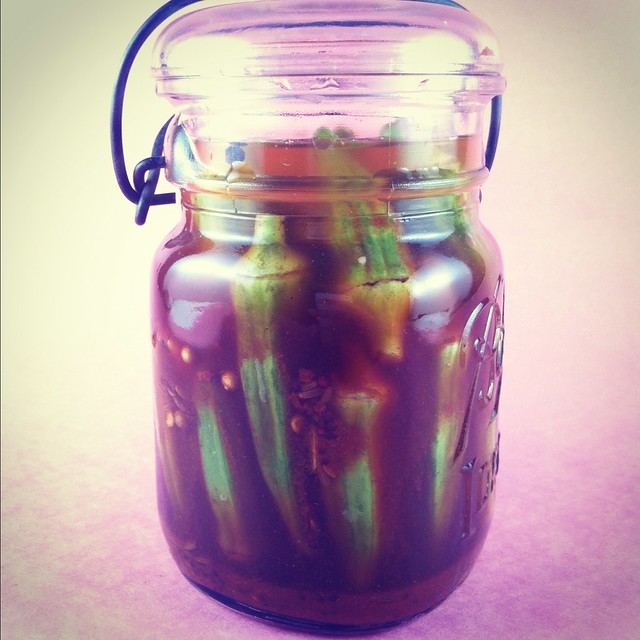
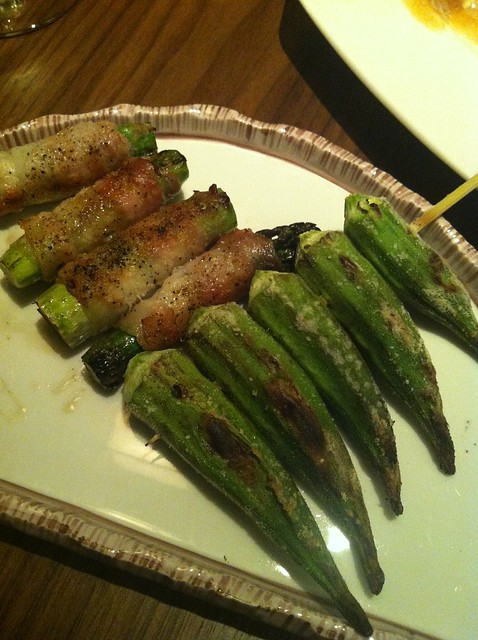
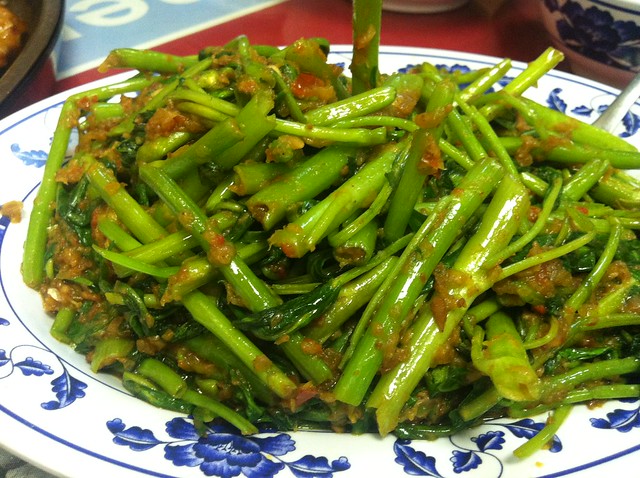
    1. Kangkong belacan – Call these hollow vegetables whatever you want: swamp cabbage, water spinach, ong choy or phak bung, but they will always be Filipino kangkong to me. Belacan, the Malaysian variety of shrimp paste is deliciously salty–the perfect side vegetable to any Southeast Asian fare.

    2. Rojak – This sweet and sour dish had the best combination of texture: cuttlefish (soft), prawn fritters (crisp), cucumber (tender), jicama (crunchy), pineapple (soft), mango (fleshy), sesame seeds (toasty). Named after the Malay term for “mix”, it not only refers to the seafood-fruit-vegetable combo, but also the multi-ethnic Malaysian-Singapore influence.
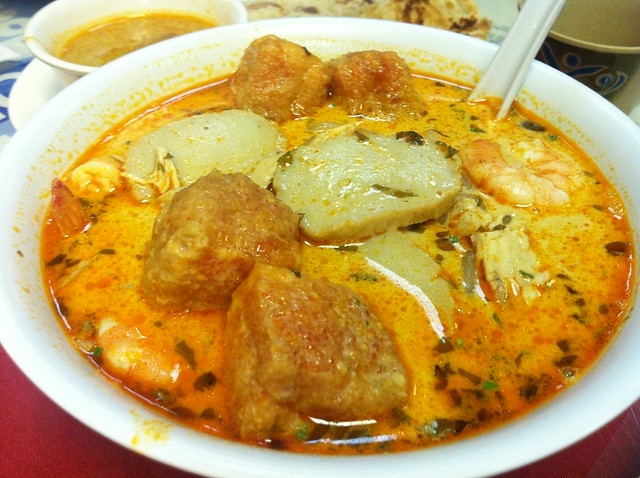
    3. Singapore kari laksa – How can you go wrong with curry as good as this? This bowl of yellow-orange noodles brought back such good memories of my trip to Singapore I almost wept. It turns out the hot broth that burst from my quickly eating the soft tofu squares were too spicy for me in one go. Burning my throat was worth it though.

    Weird:
    1. Petai beans with belacan and shrimp – Petai beans look like a larger version of fava, but they had a bitter aftertaste that was, for a lack of a better word, weird. And I rarely describe food as “weird”. After some Internet research, I found out why they would taste so weird: they’re called stink bean and resemble the smell of natural gas!

    Disappointment:
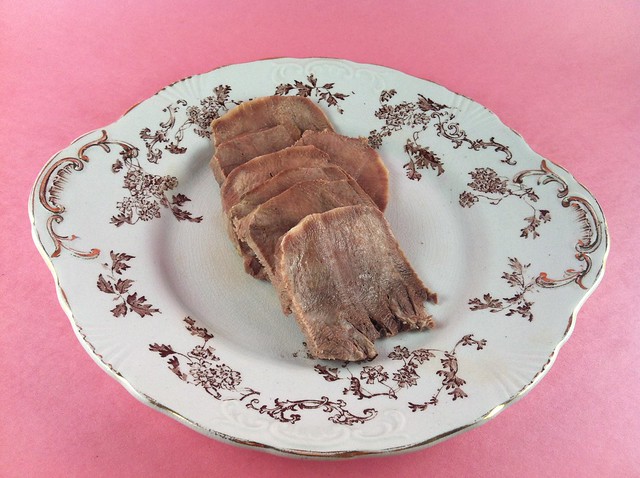
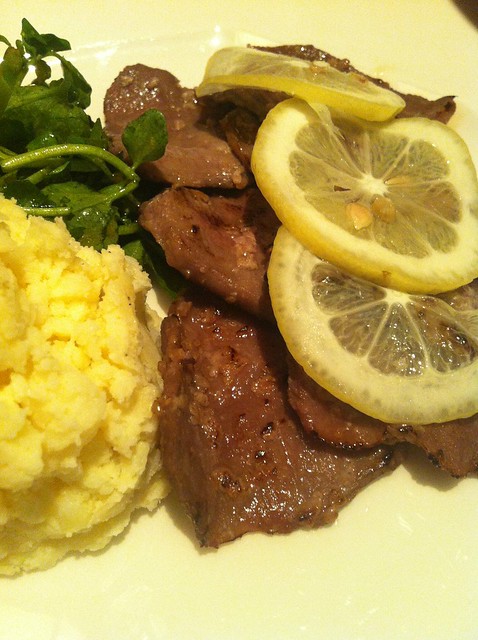
    1. Sizzling pork with marmite sauce – I was warned that the restaurant is now under new management, but that shouldn’t be a reason as to why they would serve a dish other than how it’s advertised. This dish was in no way sizzling–it was just on a plate that resembled a sizzling platter. The pork chops were soft, but lacked that chargrilled flavor I was looking for and tasted more like a bottle of store-bought sauce was lazily poured in.

  • This isn’t a recipe for a new dish as much as it is a recipe for leftovers. I had made the Japanese buta no kakuni, or pork belly, two weekends ago and still had leftovers that kept pretty well in the fridge. When it came time for a home-cooked meal this week, I scooped some of the meat up together with the already-coagulated soy-flavored liquid and heated it in a wok before tossing in with some pasta and kailan, or Chinese broccoli. Almost any greens will do, but I prefer the sturdy bitter type. You can substitute shorter penne for the orecchiette, too, if that’s what you have in your pantry.

    The sweet soy liquid that cooked down added to the sweetness of the meat and I didn’t have to season it with salt and pepper. Sometimes, the work you put ahead of time pays off much later–and in multiple meals. It’s like orecchiette with sausage and broccoli florets, only by your Asian grandmother.

    Ingredients:
    4 handfuls of orecchiette pasta
    cooked pork belly (see recipe for buta no kakuni below)
    a handful of kailan, throughly washed, chopped
    red chile flakes

    1. Bring a large pot of salty water to boil and cook the pasta until al dente, or about 20 minutes. Drain while reserving some of the pasta cooking water for later.
    2. Heat a skillet and reheat the cooked pork belly. Prod the meat gently with a wooden spoon to shred it. Toss in greens and season with red chile flakes. Turn off the heat and add the pasta until well-combined.

  • After stopping by her family’s house in Westchester unannounced, Lucy’s father was forced to gather some tomatoes and eggplants from his incredible garden to send me home with some bounty. It’s the kind of garden that I can only dream of. There are rows and rows of different shapes and colors of tomatoes, all happily dangling from pipes meticulously tied together. All shades of aubergines peek from stems covered in fuzz and peppers of all sizes dot the compact landscape. When I was invited to their upstate cabin during Memorial Day weekend, I tasted the vegetables they picked from their garden and all I’ve been wanting to do was see it for myself. How can a small plot of land yield so much love?

    Back in my apartment where the second batch of mixed greens I planted are not even making any more effort to grow past an inch, I thought of what to do with all the eggplants. If my father was in town, he would tell me to grill the slender Japanese kinds over the stove and mix with scrambled egg for a Filipino breakfast. But there was one large eggplant that looked good enough to be stuffed, and so I went through my Mediterranean cookbooks to find a recipe that did just that. The original Turkish recipe called for the beef to be baked with the eggplant. I didn’t do that because I didn’t want to dry out the beef and just opted to brown it separately. It all goes down when you serve: the eggplant flesh will be soft enough to scoop up and you top each serving off with the ground beef.

    Ingredients:
    a large knob of butter
    2 lbs ground beef
    1 red onion, thinly sliced
    1 tomato, sliced
    a handful of parsley, roughly chopped
    salt
    pepper
    red chile flakes
    1 large eggplant
    olive oil

    1. Preheat oven to 350º. Cut the eggplant in half and score the insides with multiple slits, both crosswise and lengthwise. Pour and brush some olive oil on the eggplant. Bake for 25 minutes.
    2. In the meantime, melt butter and brown ground beef for about 10 minutes in a frying pan. Add the onion, tomato and parsley and cook. Season with salt, pepper and chile.
    3. Remove eggplant to a serving plate and soften the cooked insides with a spoon so that you can stuff it with the beef.

  • The last few times I watched Lisa bake, I was in awe at how easily she had a dozen muffins and a pie done. I realized that it was the KitchenAid mixer that helped her move faster; I don’t know why I always insist on mixing batter by hand! I guess to me doing it without the machine left me with less utensils to wash, but now I know better. I also learned how to be patient and leave the oven alone until the baked goods rose; this helped them keep their intended shapes. Now I know why mine always collapsed in the middle! I’ve always been from the school of poking while cooking when it comes to meat, but now I know you’re not supposed to do that while baking.

    I was determined to work like she did the next time I tried baking at home. When that chance came up, I looked for a muffin recipe that used ricotta cheese because I had a pint of it left after I made my own ricotta-filled raviolis. I just needed two lemons to complete the recipe below.

    I highly recommend the Microplane Premium Classic zester (mine comes in a pretty turquoise handle) to make some very fine lemon zest. You see a gadget like it in the store and you immediately think, Who really needs that much zest that another tool had to be invented for it? It turns out there’s a huge difference from finely-chopping lemon peel to using a sharp zester. Again, negative points to trying to do things by hand.

    My only regret is not adding slivers of fresh strawberries or almonds on top to give it a prettier presentation. Next time I will, now that I know muffins are so much easier to make with the right tools.

    Ingredients:
    2 cups flour
    1/2 tsp baking powder
    1/2 tsp baking soda
    1/2 tsp salt
    1 cup plus 1 tsp sugar
    1 stick unsalted butter, room temperature
    finely grated lemon zest from 2 lemons
    1 cup whole-milk ricotta cheese
    1 large egg
    1 tbsp fresh lemon juice
    1/2 tsp almond extract

    1. Whisk the flour, baking powder, baking soda, and salt in a medium bowl to blend. Using an electric mixer, beat 1 cup sugar, butter, and lemon zest in a large bowl until light and fluffy.
    2. Beat in the ricotta. Beat in the egg, lemon juice, and almond extract. The batter should be thick and fluffy.
    3. Line 12 muffin cups with paper liners. Preheat the oven to 350º. Divide the batter and fill each prepared muffin cup halfway. Bake until the muffins just become a tad golden on top, about 20 minutes.

    Recommended tool/s:
    Microplane Premium Classic Zester

  • 24 Minetta Lane off Sixth Avenue
    $75 each for 3 people, with drinks, with tip
    212/933.1824
    ♥ ♥

    On a steamy Monday night, we were entertained by the Everybody Loves Raymond bartender lookalike at the bar.

    Tastiest:
    1. Fried pig’s ears – I can only cook pig’s ears Fergus Henderson style and they’re never this crispy and delicious
    2. Squash blossoms – They’re usually bland and boring with goat cheese inside, but they used Caciocavallo and anchovies
    3. Pasta with chanterelles and the pasta with tripe that did not taste like tripe at all

    Underwhelming:
    1. Braised octopus with oven-dried tomatoes – I can’t help but order octopus every time it’s on the menu, but with all their other decadent offerings, this was pretty tame.

    Notable:
    1. Great service at the bar – They make good Negronis
    2. Splitting the primi pastas between two people

    Warning:
    1. $18 for half a dozen oysters! Yikes!

  • 127 Columbia Street between Kane and Degraw Streets, Cobble Hill, Brooklyn
    $55 each for 5 people, with drinks, with tip
    718/923.9322
    ♥ ♥

    After a bland dinner at Mission Chinese the week before, I was eager to taste what a Portland, Oregon chef could bring to discerning New York City diners.

    Tastiest:
    1. Cha Cha La Vong – a turmeric-marinated catfish fried with scallions and, surprise, dill; served with vermicelli, fresh mint leaves, cilantro and peanuts
    2. Kai Yaang – roasted hen stuffed with lemongrass, garlic, pepper and cilantro
    3. Phak Buung Fai Daeng – water spinach wok-fried with fish sauce, chili and garlic

    Notable:
    1. The Chiang Mai sausage was described as having aromatics, but it failed to mention that it will be overwhelmingly kaffir lime leaves

    Questionable:
    1. 20% service fee was automatically added to our bill – I thought that was for a group of 6 or more
    2. $1 fee charged to every credit card because we used 4 and their limit is 3
    3. No American Express accepted

  • When was the last time you put food in your mouth and thought, Wow, that’s exactly what I wanted to eat tonight? I felt that way with this soup. New York City has been having really humid summers that remind me of the intense sun I experienced in Laos last August. While there, I couldn’t help but eat a bowl of Laotian pho from the lady who had a stand in the street market. I sweated over my hot bowl of soup, but cooled down as soon as I got into it. No wonder people in Asia eat hot or spicy meals no matter how hot the weather is outside–sweating cools them down.

    If you can’t make the beef stock here ahead of time, you’ll learn to multitask and use three of your stove’s burners at once. You’ll also just have to do some extra work removing the fat from the stock since you can’t just break the solidified fat as easily if you stored it in the fridge overnight. Note that I didn’t use any salt at all. The miso paste with the soy sauce should be enough sodium for your body in one serving. You may adjust the flavor by experimenting with the beef marrow stock and beef shank ratio when assembling the soup for your guests.

    There’s a lot of ingredients involved but you only need a small amount for each. I came up with this combination because they’re what I have in the pantry. Throw in lime juice, fish sauce, and cilantro in there for a more Vietnamese flavor profile. As soon as you appreciate making a flavorful broth separate from the stock, you’ll begin to master different soup bases and will get used to trying combinations of herbs and spices you never thought possible. It’s what I like about cooking, really–the leeway you have to make adjustments and the freedom you have to change and make your favorite eater happy: you.

    Ingredients:
    marrow bones
    udon noodles
    sesame oil
    bok choy
    enoki mushrooms
    hot chili oil
    1 scallion, chopped

    For the broth:
    oil
    beef shanks
    3 cloves garlic, minced
    1 small knob ginger, peeled, sliced
    1 small red onion, finely chopped
    1 scallion, chopped
    2 Thai chiles
    2 bay leaves
    1 cinnamon stick, crushed
    1 tsp fennel seeds
    1 tsp black peppercorns
    1 tbsp Sichuan peppercorns
    1 star anise
    1 tbsp miso paste
    4 tbsps soy sauce

    1. Make the beef stock ahead of time by boiling water in a very large pot and cooking the marrow bones. Remove impurities that rise to the top, and simmer covered, for about 2 to 3 hours. Let cool before storing in the fridge to let the fat coagulate at the top. When ready to make the soup, remove from the fridge and then discard the fat by scooping off the solidified fat. Set aside.
    2. Cook the beef shanks and make the broth. In a large Dutch oven, heat some canola oil. Brown the shanks on both sides and remove to a plate.
    3. Using the rendered fat in the same pot, sauté the garlic, onion, and ginger. Add the rest of the herbs and spices and keep sautéing to make them fragrant.
    4. Add back the shanks and ladle in enough beef stock to submerge them to cook the meat. Simmer for at least 30 minutes or until the meat falls off the bones.
    5. When ready to assemble the soup, boil some water in yet another pot to cook the noodles per package instructions and drain to your serving bowl.
    6. In a small sauté pan (or use the pot where the noodles were cooked), heat a scant of sesame oil and flash-fry the enoki mushrooms and bok choy.
    7. In your serving bowl of noodles, ladle in 2 heapings of beef stock and 1 broth. Top with the vegetables, sliced meat, and hot chili oil

  • This was a big hit during the Fourth of July. Some people asked me how the okras remained crunchy even after being pickled for two weeks. My secret is skipping the blanching part of most pickling recipes. After washing the okras thoroughly, I pat them dry with paper towels and put them in a jar. (I use chopsticks to keep them vertical.) They soften enough to eat raw after being in brine for a few days, but not too soft that there’s no more oomph left to them. For those who think okras are too slimy, I minimize that by keeping the tops intact. When the pickles are ready, the stems are even tender enough to eat.

    Ingredients:
    1 pound small okra, thoroughly washed, pat dry
    2 cups white vinegar
    2 tbsps sugar
    2 tbsps salt
    2 tbsps smoked paprika powder
    1 tsp whole mustard seed
    1 tsp whole white pepper corns
    1 tsp crushed chiles
    1 tsp cumin seeds
    2 cloves of garlic, minced

    1. In pickling jars, stuff the okra standing up.
    2. In a small non-reactive pot, bring the rest of the ingredients to a boil for a minute or until the salt is completely dissolved. Pour this mixture into the jar and add enough water to cover the tops of the okra. Use a small tea cup to weigh the okra down. Secure the lid and allow the jar to come to room temperature. Store in fridge.

  • Don’t let this offal turn you off. This lengua, or beef tongue, taco recipe will be one of the easiest things you’ll make at home providing that you have the 3 hours to simmer the tongue which you can totally do way ahead of time. The July 4th holiday is coming up, so really, you have no excuse not to do this for you and your omnivorous friends.

    The tomatillo sauce was the easiest to make since you just put everything in a food processor and pulse. Sure you can buy the ones from the grocery store, but what are you doing while waiting for that tongue to simmer? You might as well have everything homemade, right?

    When assembling your tacos, feel free to add avocados if you’re in your California mood, or thinly-sliced French breakfast radishes for some extra tartness. I simply used my hinona kabu, or Japanese turnips, harvest from my terrace. The roots didn’t quite make it because of the humidity, but I got some nice salad greens out of them.

    Ingredients:
    1 beef tongue, completely thawed if frozen, thoroughly washed
    1 large onion, halved
    1 head of garlic, peeled and crushed
    4 bay leaves
    1 tbsp of peppercorns
    salt
    oil
    corn tortillas
    radish tops, thoroughly washed
    hot sauce

    For the tomatillo sauce:
    6 tomatillos, husks removed, halved
    1 small bunch of cilantro, roughly chopped
    2 cloves garlic, minced
    1 jalape¤o, chopped
    juice from 1 lime
    salt
    sugar

    1. In a large pot, boil the tongue with enough water to cover and add the onion, garlic, bay leaves, peppercorn and salt. Reduce to a simmer, cover, and cook up to 3 hours, or until the tongue is soft to the touch.
    2. Remove the cooked tongue from the water to a chopping block until it’s cool to the touch. Using a paring knife and your hands, peel off the white-colored skin covering and discard. You may also discard the the rough patch where the tongue was attached to the cow’s mouth if that’s too much to look at–but it’s perfectly edible.
    3. Slice the tongue in 1/4-inch slices. Heat some oil in a skillet and quickly sear tongue slices. Remove to a sieve to drain the oil.
    4. Make your tomatillo sauce. Broil the tomatillos in the oven for 10 minutes. Remove to a food processor and pulse them with the rest of the sauce ingredients. Season to taste.
    5. Assemble your tacos. On a skillet over medium fire, warm the corn tortillas to soften. Let your guests top their tortilla with the tongue pieces, radish tops and tomatillo sauce. Don’t be afraid to use more hot sauce!

  • Arctic char looks and tastes similar to salmon but I prefer its natural sweetness that lends itself to frying. Cooking either fish filleted is easy as long as you dry them with paper towels and heat your skillet with oil until it’s sizzling–this will keep the fish from sticking to the pan and falling apart when you have to turn them over. Israeli couscous, or ptitim, are shaped like little balls made out of wheat flour rather than the finer North African version made out of semolina. I just added butternut squash here to make the dish more filling. The preserved lemon isn’t necessary here, but I think it makes a nice surprising bite if you have them handy (and, boy, do I have them handy).

    This is probably not the dish you’d think of cooking and packing for lunch when you go on a hike, but it’s what I did one Friday night for lunch the next day when I hiked Breakneck Ridge in Cold Spring, New York. We’ve had a dry spell here in the city and I just wanted to be away from concrete for a few hours and be surrounded by some trees and the Hudson River. My hiking companion seemed game for the outdoors even though we just started hanging out, so we met in the train to Poughkeepsie on Saturday morning; him getting on Grand Central, me in Harlem. He earned pogi points for being a good sport and making it to the top of the trail with me, and I think I earned mine for not packing granola bars for lunch.

    Wouldn’t you want something extra special to eat with this summer view as well?

    Ingredients:
    1 small butternut squash, peeled, seeded, cubed
    olive oil
    salt
    1 large onion, peeled and minced
    1 preserved lemon, seeded, sliced
    a handful of arugula, thoroughly washed, torn
    1 3/4 cup Israeli couscous
    1 small cinnamon stick
    2 fillets of arctic char, rinsed, dried with paper towels
    a handful of golden raisins
    a handful of parsley, roughly chopped
    a handful of pine nuts, toasted

    1. Preheat the oven to 475º. Toss the butternut squash pieces in a jigger of olive oil and a pinch of salt in a large baking dish. Place in the oven until squash is tender, about 15 minutes.
    2. While the squash is cooking, heat some olive oil in a skillet and cook the onions over medium-high heat with a bit of salt until translucent. Combine the squash and onions into a large bowl with the preserved lemon. Toss in the greens to wilt.
    3. Cook the Israeli couscous. Bring a large pot of salted water to a boil and cook with the cinnamon stick until tender, about 10 minutes. Drain, but do not rinse, and get rid of the cinnamon. Gently fluff with a fork so that they do not form into one big blob.
    4. Cook the fish. Season the fillets with salt and pepper. Heat some more olive oil in a skillet over medium-high heat. When the oil sizzles, add the fish in a single layer with the skin side down. Cook them for 3 minutes, and then using a flat spatula, turn the fillets and cook for another 2 minutes.
    5. Add the cooked couscous to the bowl of squash, onions, and lemon and toss with raisins, parsley, and toasted pine nuts. Top with the fish to serve.

  • 8 West 18th Street between Fifth and Sixth Avenues
    $58 each for 2 people, no drinks, with tip
    212.255/0018
    ♥ ♥

    Ootoya may be a restaurant chain, but the newly opened New York City branch looks anything but.

    Tastiest:
    1. Grilled beef tongue – will be the most buttery thing you’ll ever put in your mouth this season
    2. Tonkatsu – The pork tonkatsu will make you believe in breaded meat again

    Notable:
    1. Tofu salad – The soft tofu will remind you of freshly made burrata; make sure you drizzle the dressing all over the greens to get the salad’s whole flavor profile; a little salt may need to be added

    Good:
    1. Sushi – The fish is fresh, just nothing exceptional. The chirashizushi is a very good deal if you’ll only eat one thing and expect to be full.
    2. Yakitori – Just like any other grilled vegetables from Japanese yakitori joints, the asparagus wrapped with bacon are standouts. The okra may have been a tad too mature.

    Service:
    1. Japanese politeness galore. I will expect more rowdiness when the liquor license comes through.

  • I grew up in the Philippines where a lot of vegetables were called differently from what they use here in the States. A good example is turnip. My turnip, or singkamas, has a tough brown skin and a white, watery, and almost translucent flesh inside that you eat with shrimp paste or vinegar and fish sauce during the summer months. Here in New York, that’s the same as the Mexican jícama while the turnip has a thinner skin that’s white at the bottom and purple towards the top and it has a slight bitter taste perfect for raw salads.

    For some of you, the American turnip might be too bitter here and that’s why I decided to add honeydew for a slight tinge of sweetness and a different texture. Cantaloupes should be okay too and would be a good addition if you use both turnips and jícama. The portions below made a perfect appetizer for two people.

    Ingredients:
    1/4 lb cooked shrimp, deveined, peeled
    2 small to medium-sized radishes, thinly sliced
    1 small turnip, peeled, thinly sliced
    half a honeydew, the flesh thinly sliced
    1 stalk of scallions, diagonally sliced

    For the dressing:
    ginger knob, peeled, crushed
    a splash of fish sauce
    juice from 1 lemon
    olive oil
    pepper
    red chili flakes

    1. In a large glass bowl, whisk all the dressing ingredients. Toss in the shrimp and chill in the fridge for about 15 minutes.
    2. When ready to assemble the salad, remove the shrimp from the fridge and add the vegetables and fruit. Toss until well combined. Add more olive oil if necessary.