The city park across from my apartment threw this wooden palette away a few weeks ago. I walked past it while I was walking my dog, Atticus, and decided to come back for it after I dropped him off at home. I dragged it a block and a half home and there was no turning back after I leaned it against my terrace wall.
Look, I already know I have enough plants and planters, but since I decided to plant all tulip bulbs in my cedar box last October, there really isn’t any room for herbs this upcoming season.

The living wall planters from Woolly Pocket have worked well for me indoors, but I wanted to DIY this outside and not spend too much money. The non-woven felt I bought from Amazon.com was only $17 for the roll and because it’s non-woven, it will not unravel and should stand up to mold, mildew, and fading. You’ll need a staple gun here and some extra heavy-duty staples in case you get staple-happy like I did.
Brief interruption: here’s a photo of Atticus hiding in the hallway because he was scared of the loud thuds coming from my staple gun. He kept peeking to see if I was done. So friggin’ cuuuuute.

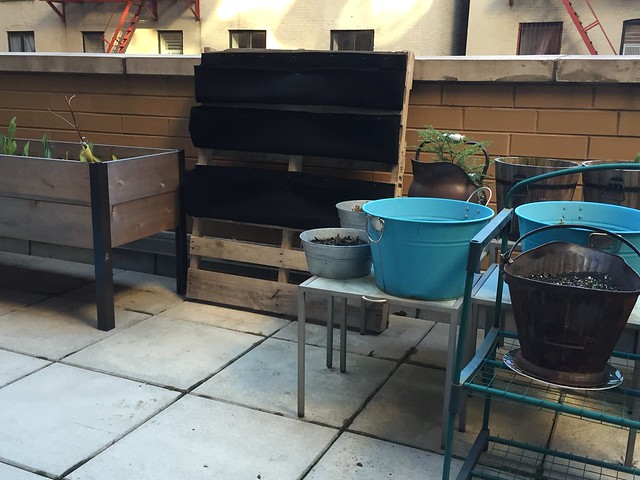
A regular wooden palette is 39 inches wide if you want it to stand on the shorter side. The roll of black felt I bought was 10′ x 4′. Using fabric scissors, I cut about 16 inches vertically for my first pocket so that when folded, the pocket depth is more or less 8 inches deep. The depth is up to you and may depend on how close the palette stripes are. Mine wasn’t evenly spaced, so as you can see, the third stripe is deeper just because it had to be stapled to a lower rung.
To make one rectangular pocket, I stapled the felt horizontally to the top edge of the first palette stripe, making sure there’s about 3 to 4 inches overhang on either side. I also stapled the bottom edge to make sure it holds.

I folded the vertical edges in and stapled them to seal the sides. Then I folded the rest of the felt up to make a pocket. At each vertical edge, I fanned out the felt and made a pleat to mimic an accordion before stapling along that edge. This gives you room for the soil and plants later.

I stapled the front middle lip to keep the pocket from sagging. Once I have the soil in place, I’ll decided whether I’ll staple more in the front to make smaller individual pockets. I think I’ll keep to 3 rows though because the lowest stripe is too low on the ground.
Come back to this post when I update it with soil and plants!
—
First update:
We didn’t have planting weather here in New York 3 weeks until I after I assembled this palette planter and even then, it wasn’t warm enough to actually start gardening. I did put down some seeds and there was a peep of life after it rained for 5 days straight.

Now, it has been an additional 3 weeks and these red kales are taking shape! The pocket below it also has some smaller sprouts, but the others are showing no signs of life. I’m still waiting though before I put Plan B in place, which is to buy herbs and replace them in those lifeless pockets.
Recommendations:
1. Black non-woven felt that will withstand the elements
2. A nice staple gun that you won’t be able to live without after your first project
3. Extra heavy-duty staples