Baking instructions are weird. This recipe came from Bon Appetit and I had to enlist two of my friends’ help to decipher what the original recipe meant by “Butter pan, then line with 2 overlapping 16×12 sheets of parchment, making sure parchment comes at least 2 inches above top of pan on all sides.”
Why am I buttering the pan and then lining it with parchment paper? Seems like a waste of butter. Oh, I see; the butter will seep through the paper and keep the cheesecake from sticking to the pan–you just don’t want the butter directly in the cheesecake.
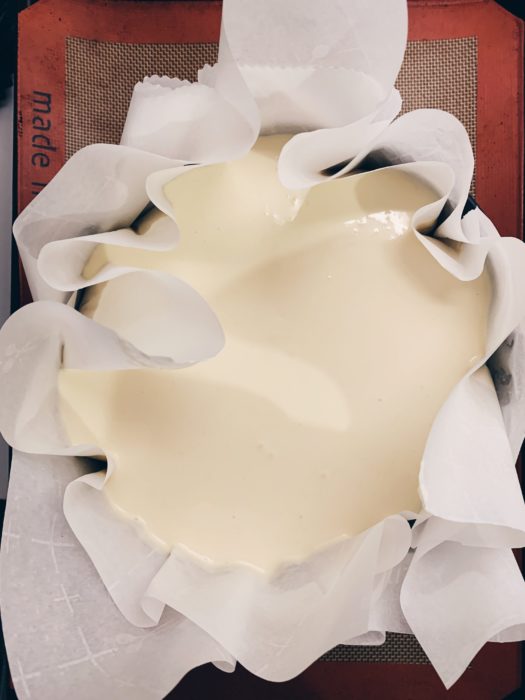
What’s up with all the wording to line the pan with paper? I’ve re-worded that bit here to make it more simple, and I think mine is easier to understand especially by beginners like me.
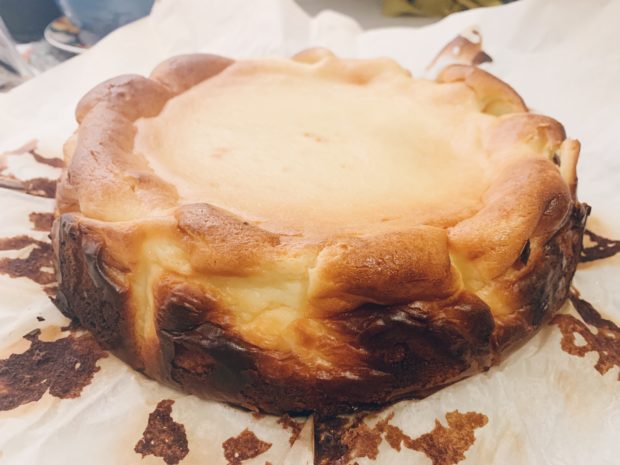
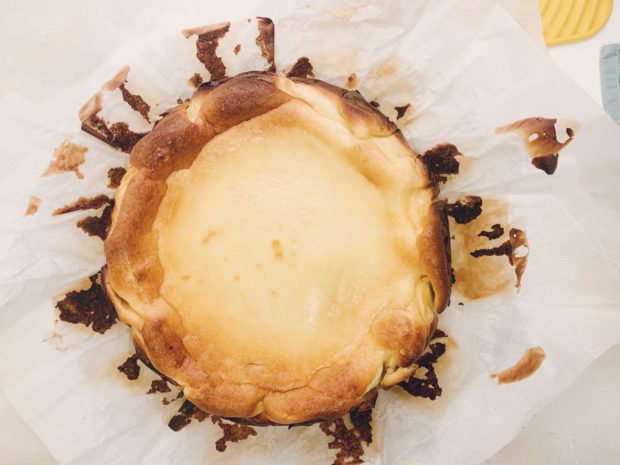
Don’t be tempted to open the oven while you’re baking this cheesecake. You want it to collapse after you’ve baked it, not during. The middle part will give a little while it’s cooling, but that will tell you that it’s indeed jiggly inside.
Ingredients:
a small knob of soft unsalted butter
2 lbs cream cheese, room temperature
1 1/2 cups sugar
6 eggs
2 cups heavy cream
1 tsp salt
1 tsp vanilla extract
1/3 cup flour1. Move oven rack in the middle of the oven and preheat to 400°. Butter the springform pan, then line and pleat with 2 sheets of parchment paper that’s oversized enough to make sure that at least 2 inches come up on the sides of the pan. Then place pan on a rimmed baking sheet.
2. In your stand mixer with a paddle attachment, beat cream cheese and sugar in the bowl on medium-low speed, scraping down sides of bowl, until very smooth and sugar has dissolved, about 2 minutes.
3. Increase the speed to medium and add eggs one at a time, beating each egg 15 seconds before adding the next. Scrape down sides of bowl, then reduce mixer speed to medium-low. Add heavy cream, salt, and vanilla and beat until combined, about 30 seconds.
4. Remove bowl from the mixer and sift flour evenly over cream cheese mixture. Mix with a spatula while scraping down the sides of bowl until the batter is smooth and silky.
5. Pour batter into prepared pan. Bake cheesecake for an hour until golden brown on top but still very jiggly in the center.
6. Remove from oven to let cool slightly then unmold. It will collapse as it cools–that’s okay! Let cool completely. Carefully peel away parchment from sides of cheesecake. Slice into wedges and serve at room temperature.
Related post/s:
You will need a 10-inch diameter non-stick springform pan for this
Some parchment paper is also necessary