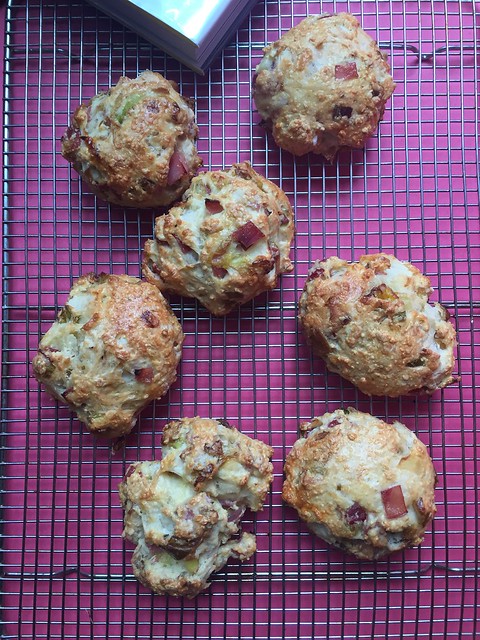
Ham, Cheese, and Leek Scones

My latest favorite cookbook is Violet Bakery’s by Claire Ptak. I feel like most cookbooks are all the same these days. They use the same photo style with the filtered-look and the same minimalist design throughout. So before I pick up a copy of any cookbook these days, I skim through the pages and see if there’s even a recipe I would like to try at home either because it looks easy enough to test (in the case of baked goods) or if it’s interesting enough to bother. Otherwise, you can just Google everything, right?

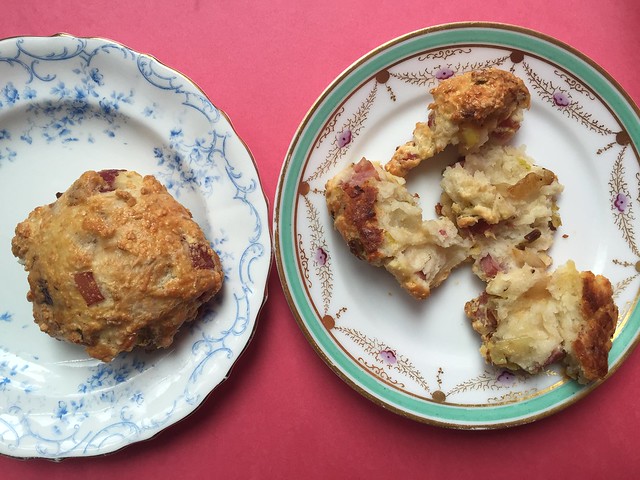
Claire Ptak’s recipe for these savory scones was one of those that made me salivate. I needed my friend Lisa’s help understanding some of the baking terms though. What the hell does it mean to cut the butter? She found my question amusing enough that she made a video with her iPhone of her holding two knives and making scissor-like motions with them upright–basically “cutting through” the butter. Now, I know that’s what bakers do and the term wouldn’t have elicited any reaction from baking pros, but to me, it just didn’t make sense. Why not just say mix the butter in with the flour and use the back of a fork to combine and make it crumbly? I changed that step below, so sue me! I also converted the measurements to plain ol’ American English so you don’t have to. Lastly, I only used cooked ham here from the meat counter at my supermarket, but feel free to use good quality prosciutto.

Ingredients:
2 leeks, trimmed, rinsed, sliced into small pieces
2 tbsp unsalted butter
2 tbsp olive oil
salt, pepper
2 cups parmesan cheese, grated
2 1/4 cups of flour, plus more for your work surface
2 tbsp baking powder
1 stick of unsalted butter, cut into cubes
2 cups plain yogurt
2 cups of cooked ham, cut into bite-sized pieces
1 egg, lightly beaten with a little milk or water, for the egg wash

1. In a large skillet over medium-low heat, heat the smaller knob of butter and the oil until the butter starts to foam. Add the leeks and sauté for about 10-15 minutes until soft. Season with salt and pepper. When they are cooked, transfer to a bowl and chill in the fridge until ready to use.
2. In a medium bowl, combine and stir the parmesan, flour, and baking powder. Add and mix in the stick of butter with the back of a fork until crumbly. Add the yogurt, ham, and chilled leeks. Season with salt. Mix to combine and then form a cube and place on your lightly floured surface.
3. Pat the dough into a thick log and cut out scone triangles, about 12 of them. Line a baking sheet that can fit into your fridge with parchment paper. Place the scone on the sheet and chill to set, about 1 hour.
4. Preheat the oven to 350º. When ready to bake, line a different large baking tray with parchment paper, place the chilled scones on it and brush the scones with the egg wash. Bake for 25-30 minutes until golden.

Recommendations:
The Violet Bakery Cookbook is very pretty and practical at once.
Venison Stew with Stout Beer

I think it probably went into the freezer maybe a day after it died, said Carly when she gave me some venison meat her father and brother hunted in Pennsylvania. I’m never going to pass on fresh meat so I was quite glad to take some from Carly’s hands when she came back from visiting her parents.

Ever since I did spring cleaning using the KonMari method of Marie Kondo, I’ve been trying to use up all the food I found in my pantry before I buy anything new. I found this bag of manti, or mini Turkish dumplings, and was told by my Turkish friend, Elle, that I cook them like tortellini and serve with a garlic yogurt sauce with butter and sumac. I don’t have any of those ingredients so I decided to use them with this venison stew in lieu of egg noodles or pasta. I also had leftover kale, parsley, and 1 lonely scallion in the fridge so I used them all up too. The kale made the stew a bit bitter here so I tried to repair it with some lime juice–also leftover–before serving.

The venison meat is definitely not fatty; I can taste the gaminess and can tell how muscular the animal was since it’s been running around the woods. I thought a stout beer was perfect here, sort of like a carbonnade, or a traditional Belgian stew made with beef. (The Storm King Imperial stout beer was also leftover from a beer tasting, but you can use Guinness if that’s all you can get.) It was a hearty supper considering the temperature dropped back down to 20 over the weekend.

Ingredients:
venison stew meat, cut into 2-inch cubes
salt, pepper
a knob of butter
4 slices bacon, chopped
1 medium yellow onion, chopped
1 tbsp brown sugar
2 cloves garlic, minced
1/2 bunch of kale, center ribs and stems removed, torn into smaller pieces
1 bottle stout beer
chicken stock
3 bay leaves
3 sprigs fresh thyme
juice from 1 lime
a handful of parsley, roughly chopped
1 scallion, chopped

1. Dry the venison with paper towels, then salt and pepper generously. Heat a large Dutch oven over medium-high heat. Add the butter and bacon and cook until crispy. Remove the bacon with a slotted spoon and chop, reserving for later. Add the meat to the pot, in batches to avoid overcrowding, and raise the heat to high. Sear the meat well on all sides, then remove to a plate.
2. Add the onions and brown sugar to the pot and reduce the heat to medium-low. Cook, stirring occasionally, for about 20 minutes, or until the onions are soft and caramelized. Sauté in the garlic and the kale and cook until the leaves are wilted.
3. Raise the heat to medium-high. Pour in the beer and scrape the bottom of the pot with a wooden spoon to loosen any brown bits. Bring to a boil, then add the crispy bacon and the venison along with its juices. Add enough chicken stock to cover the meat, then the bay leaves and thyme. Reduce the heat, cover, and simmer until the meat is very tender, about 2 hours.
4. Uncover the pot and raise the heat to medium to reduce the liquid to a sauce-like consistency. Before serving, adjust the taste by adding salt and pepper and lime juice. Serve with pasta, rice, or noodles, and sprinkle with parsley and scallions.

Recommendations:
Amazon sells venison stew meat, you know, if you don’t have good friends who come from hunting families. The Marie Kondo book, The Life-Changing Magic of Tidying Up: The Japanese Art of Decluttering and Organizing will change your life.

How to Make Your Own Wooden Palette Planter with Felt

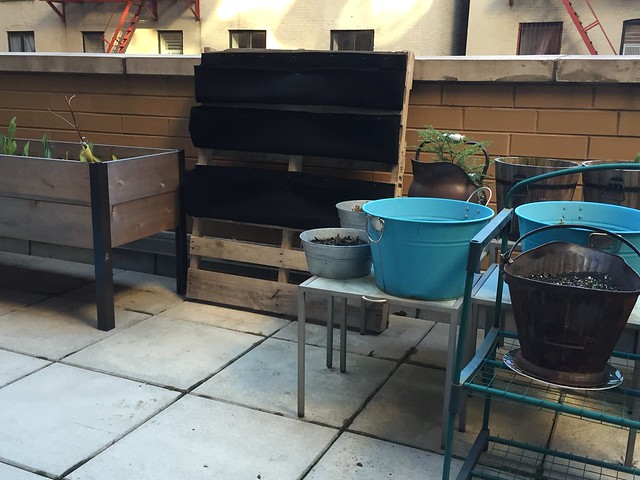
The city park across from my apartment threw this wooden palette away a few weeks ago. I walked past it while I was walking my dog, Atticus, and decided to come back for it after I dropped him off at home. I dragged it a block and a half home and there was no turning back after I leaned it against my terrace wall.

Look, I already know I have enough plants and planters, but since I decided to plant all tulip bulbs in my cedar box last October, there really isn’t any room for herbs this upcoming season.

The living wall planters from Woolly Pocket have worked well for me indoors, but I wanted to DIY this outside and not spend too much money. The non-woven felt I bought from Amazon.com was only $17 for the roll and because it’s non-woven, it will not unravel and should stand up to mold, mildew, and fading. You’ll need a staple gun here and some extra heavy-duty staples in case you get staple-happy like I did.

Brief interruption: here’s a photo of Atticus hiding in the hallway because he was scared of the loud thuds coming from my staple gun. He kept peeking to see if I was done. So friggin’ cuuuuute.

A regular wooden palette is 39 inches wide if you want it to stand on the shorter side. The roll of black felt I bought was 10′ x 4′. Using fabric scissors, I cut about 16 inches vertically for my first pocket so that when folded, the pocket depth is more or less 8 inches deep. The depth is up to you and may depend on how close the palette stripes are. Mine wasn’t evenly spaced, so as you can see, the third stripe is deeper just because it had to be stapled to a lower rung.

To make one rectangular pocket, I stapled the felt horizontally to the top edge of the first palette stripe, making sure there’s about 3 to 4 inches overhang on either side. I also stapled the bottom edge to make sure it holds.

I folded the vertical edges in and stapled them to seal the sides. Then I folded the rest of the felt up to make a pocket. At each vertical edge, I fanned out the felt and made a pleat to mimic an accordion before stapling along that edge. This gives you room for the soil and plants later.

I stapled the front middle lip to keep the pocket from sagging. Once I have the soil in place, I’ll decided whether I’ll staple more in the front to make smaller individual pockets. I think I’ll keep to 3 rows though because the lowest stripe is too low on the ground.

Come back to this post when I update it with soil and plants!

First update:
We didn’t have planting weather here in New York 3 weeks until I after I assembled this palette planter and even then, it wasn’t warm enough to actually start gardening. I did put down some seeds and there was a peep of life after it rained for 5 days straight.

Now, it has been an additional 3 weeks and these red kales are taking shape! The pocket below it also has some smaller sprouts, but the others are showing no signs of life. I’m still waiting though before I put Plan B in place, which is to buy herbs and replace them in those lifeless pockets.

Recommendations:
1. Black non-woven felt that will withstand the elements
2. A nice staple gun that you won’t be able to live without after your first project
3. Extra heavy-duty staples

Farro with Pickled Carrots, Kale and Shiitake Mushrooms

Spring cleaning is a bitch to do, but it’s always worth it in the end. You stand in front of your pantry and you can actually find stuff! I was applying the KonMari method of Marie Kondo to my kitchen cabinets when I found a small bag of farro. I set it aside to remind me to make use of it later in the week for a healthier dinner option. The carrots were a bit stale, found in the back of the vegetable bin, so I decided to quick-pickle them here. I used leek and scallions since I had leftovers, but feel free to use onions and some parsley for green coloring instead. If you want to impress, sous-vide your eggs at 146º for 45 minutes and crack them open on top of the salad before serving.

Ingredients:
a handful of baby carrots
1/2 cup white vinegar
1 tsp sugar
salt, pepper
olive oil
1 cup semi-pearled farro
2 garlic cloves, minced
1 leek, cleaned, chopped
1 scallion, chopped
a large handful of dried shiitake mushrooms, soaked, drained, chopped
1/2 bunch of kale, center ribs and stems removed, torn into smaller pieces
a jigger of fish sauce
2 large eggs, fried

1. Quick-pickle the carrots. In a small saucepan, bring vinegar, sugar, 1 tsp salt, and 1/2 cup water to a boil, stirring to dissolve sugar and salt. Pour over carrots in a bowl; let sit at least 30 minutes, or until ready to use. Drain, reserving 1/4 cup pickling liquid.
2. Cook farro. In a medium saucepan, heat olive over medium-high heat. Add farro and garlic and cook, stirring constantly, until farro is dark brown, about 10 minutes. Add 6 cups water and bring to a boil. Boil farro until tender but still firm to the bite, about 25 minutes. Drain; let cool.
3. Heat some more oil in a large skillet over medium-high heat. Sauté leek and scallions. Add mushrooms and kale and cook, tossing often, until mushrooms are soft and kale is wilted. Season with fish sauce and pepper. Add the pickled carrots and the farro. Pour in some of the pickling liquid to make sure it’s not dry. Serve and top with the eggs.

Recommendations:
The Marie Kondo book, The Life-Changing Magic of Tidying Up: The Japanese Art of Decluttering and Organizing will change your life. I also highly recommend the Anova Sous Vide as one of those toys you don’t think you need.

Blueberry-Cardamom Muffins

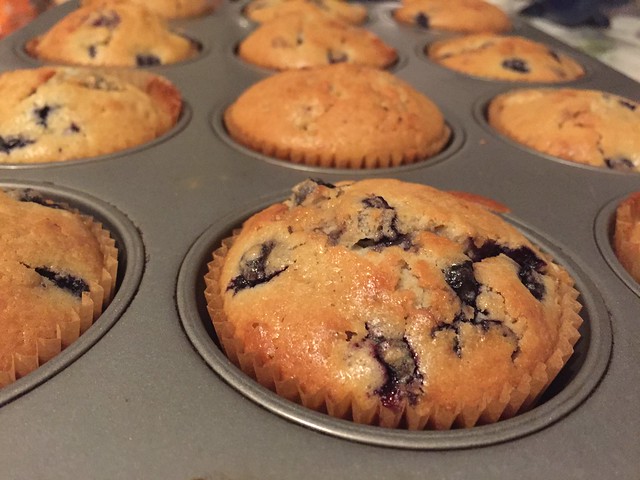
This is a Tasting Table recipe that I’ve adapted after I realized that I had all the ingredients in my pantry. I’ve made small changes like using frozen blueberries that I thawed out and gently patted down with a paper towel, and then I cut down the sugar and skipped the sugar topping altogether. All my changes are reflected below. This batch made 12 incredibly tasty muffins that I ate for breakfast, afternoon snack, and a late dessert!

Ingredients:
2 cups all-purpose flour
2 tsps baking powder
1 tsp salt
1/2 tsp cardamom seeds, grounded
1 stick of butter, at room temperature
3/4 cup sugar
1 tsp vanilla extract
2 eggs
1/2 cup whole milk
2 cups frozen blueberries, thawed, then gently patted dry with a paper towel

1. Preheat the oven to 375º and line a standard muffin tin with paper liners. In a medium bowl, whisk together the flour, baking powder, salt and cardamom, then set aside.
2. In a stand mixer fitted with the paddle attachment, beat the butter with the sugar and vanilla, about 3 minutes. Add the eggs, one at a time, beating well until incorporated before adding the next. With the motor running, slowly add the flour mixture in 2 additions, alternating with the milk, until a smooth batter comes together with the help of a spatula.
3. Remove the bowl from the stand mixer and fold in the blueberries. Divide the batter between the muffin liners. Bake until golden brown for about 30 minutes.

Recommendations:
There are a lot of cheap muffin liners out there, but I quite like these large ones for breakfast items because I like more cake in my muffins.